Documentation
Introduction
Getting Started
We hope you find this source code useful! In this page we'll cover the below installation details.
- Food Admin
- Food Admin Backend
Instructions
We'll cover the installation of API URL & Key, Settings, Database Installation and Connection.
Food Admin
Set Food Admin Backend API Path
- You have to upload your food admin backend to cpanel server so that you would connect to your admin panel.
Follow the below steps.
- FoodAdmin->src->app->constant->constant.ts
- update url and imageurl of your food admin backend server path.
eg.
let url = "https://mydomain.com/FoodAdmin/AdminServer/";
let imageurl = "https://mydomain.com/food/";
Note - FoodAdmin/AdminServer is folder name in which our food admin backend source code is uploaded. You need to change folder name if your folder name is different. For imageurl put you food app backend server path for images.

Setting URL
- Update below url to for food app pages.
Follow the below steps.
Admin Menu Path : Food Admin -> Settings -> Other Settings
- Terms & Conditions
- Cancellation
- Privacy Policy
- FAQ
eg.
https://mydomain.com/food/terms.html
https://mydomain.com/food/refund.html
https://mydomain.com/food/privacy-policy.html
https://mydomain.com/food/faq.html

Setting API Key & URL
- Update below API key & URL.
Admin Menu Path : Food Admin -> Settings ->API Key & URL

Follow the below steps.
Domain URL
eg.
https://mydomain.com/
Upload URL
eg.
../../food/
Note - food is folder name in which our food app backend source code is uploaded. You need to change folder name if your folder name is different. We upload images inside this folder from admin panel.
One Signal API URL , One Signal Authorization Key, One Signal ID
eg.
One Signal API URL : https://onesignal.com/api/v1/notifications
Note - One Signal API URL is constant you can use above URL. For Authorization Key and App ID follow below one signal website or you tube tutorial.
One Signal URL
eg.
food/
Note - food is folder name in which our food app backend source code is uploaded. You need to change folder name if your folder name is different. We upload images inside this folder from admin panel.
Video URL
eg.
https://mydomain.com/food/Video_Ads/ads1.mp4
Delivery Charges , Tax
eg.
Delivery Charges : 50(in Rs)
Tax : 5 (in %)
Admin URL
eg.
FoodAdmin/
Note - Food Admin Backend Folder Path.
Google Map API
Follow below you tube tutorial to get Google Map API Key.
Razor pay Key
Follow below you tube tutorial to get Razor pay Key.
CPANEL SMTP Mail
Follow below you tube tutorial to get SMTP Mail.
eg.
smtp.yoursmtp.in
Rate URL
eg.
https://play.google.com/store/apps/details?id=yourapppackagename
Food Admin Backend
Upload Project
- You have to upload your backend project to CPANEL so that you would connect with your admin panel.
- you can also use below URL for instructions.
URL: https://www.hostgator.com/help/article/how-to-upload-a-file-using-the-file-manager
My SQL Database Install
- First of all , you have to create database and it's user .
- Must copy the username , database name & password from the instructions, we would use them for connection with code.
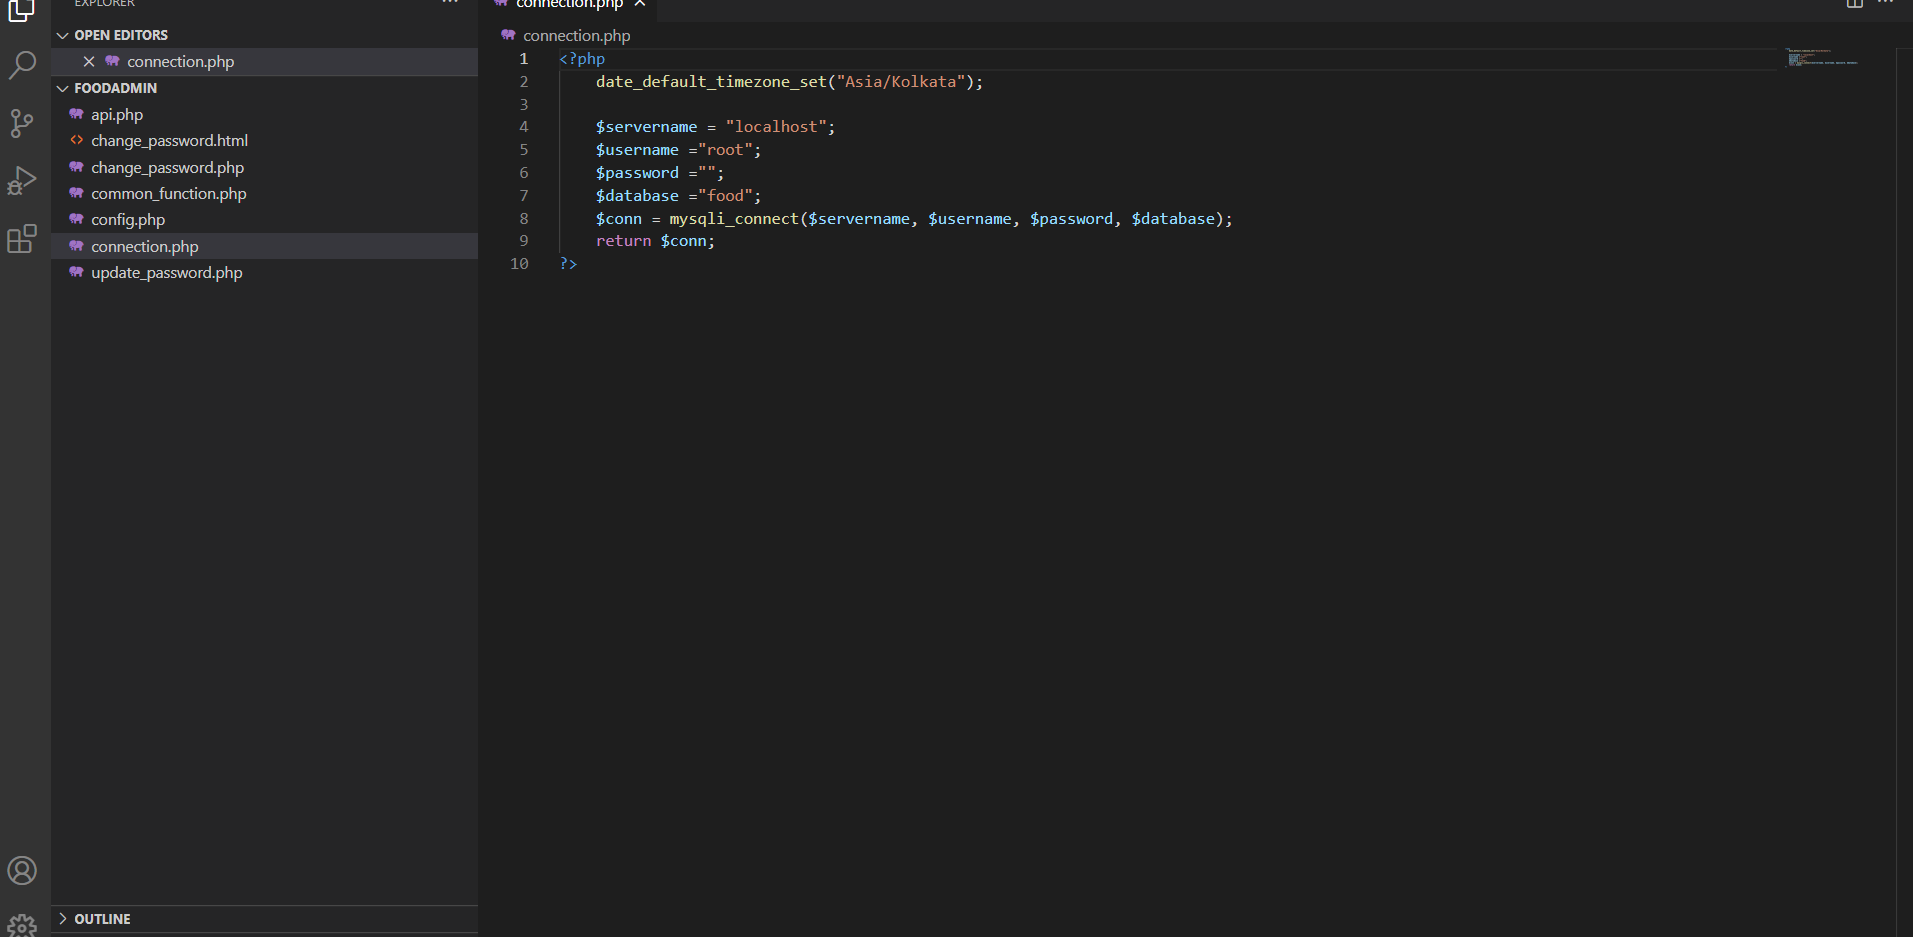
My SQL Database Connection
- After successfully database installation we need to config in our connection file.
Follow the below steps.
- FoodAdmin->connection.php
- Update username, password ,database name which we have created above.